Feeds:
Posts
Comments

DSC02413Pumpkin bars are practically a fall rite of passage, but many of the recipes for these seasonal treats are loaded with sugar, fat and very little nutrients because they are made with canned pumpkin. Not these. I took the famous Paula Deen pumpkin bar recipe and gave it a healthy makeover with less egg, sugar and oil, but all of the flavor and then some.

The secret ingredient in these bars is (drum roll please): roasted squash! I received about eight gorgeous acorn squash from my coworker, Marie Iverson, whose husband grows them on his farm. I roasted about half of them up one afternoon, then saved all of the squash filling for bars, soups and side dishes.

This tastes just like the canned pumpkin kind of bar, but better! The squash flesh is so sweet and flavorful, you can eat it plain and be completely satisfied. Best of all, when you use fresh, locally grown squash, the bars taste better and add lots of vitamins, minerals and fiber to this treat! I added whole-wheat flour to the recipe for added fiber and nutrients.

The bars were a huge hit with my family and coworkers, who all agreed that they were so flavorful, they didn’t miss the cream cheese frosting! For those pumpkin bar purists out there, I found a lower calorie/fat frosting recipe that will work nicely with these bars and no one will know the difference!

NOTE: You will need to roast one medium-sized squash before starting this recipe. This takes about an hour or so with prep included, so I roast my squash well before I make the bars. Directions for roasting are at the bottom of this post.

Ingredients:

3 eggs
3/4 cup brown sugar
3/4 cup white sugar
1/2 cup vegetable oil
2 cups roasted acorn squash* (butternut will work just as well)
1 cup whole-wheat flour
1 cup all-purpose flour
1 tsp. cinnamon
1 tsp. freshly ground ginger
1 tsp. salt
1 dash nutmeg
2 tsp. baking powder
1 tsp. baking soda

DSC02409Directions:

1. Preheat the oven to 350 degrees F.

2. Using a hand mixer, combine the eggs, sugar, oil, ginger and roasted squash until light and fluffy. (Use electric mixer at medium speed.)

3. Combine the flour, baking powder, cinnamon, nutmeg, salt and baking soda.

4. Add the dry ingredients to the pumpkin mixture and mix at low speed until thoroughly combined and the batter is smooth.

5. Spread the batter into a greased 13 by 10-inch baking pan.

6. Bake for 30 to 40 minutes, or until a toothpick inserted in the middle of the pan comes out clean.

7. Cool and cut into bars.

* Directions for roasting a squash:

1. Cut the squash in half and scoop out the seeds. Save the seeds for toasting!

2. Set both halves face down on a baking sheet with a rim.

3. Pour enough water onto the baking sheet to cover the bottom with water.

4. Roast for 40 minutes, or until squash are tender.

5. Allow to cool, then use or store in an airtight container in the fridge for later.

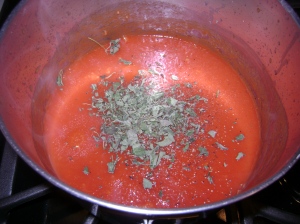
DSC02280This is my first meat dish on the blog! I was challenged to make it by a large container of leftover chicken in my fridge. I wanted an Italian-spiced dish, but something that the kids would like (they prefer spaghetti to almost anything). This dish features a special mix of goat cheese, fresh mozzarella and lemon zest, paired with a simple garlic and herb tomato sauce. It’s easy, wholesome and offers lots of leftovers! (And my kids LOVED it!)
Ingredients:

3 cloves garlic
1 tsp. dried basil
1 tsp. dried oregano
1 tsp. dried thyme
2 tsp. olive oil
2 tsp. lemon zest
1 can tomato sauce
2 1/2 cups chopped chicken
2 cups grated fresh mozzarella, leave 1/2 cup to top casserole
1 package herbed goat cheese
1 pound spiral pasta

DSC02273Directions:

1. Preheat oven to 375.

2. Boil pasta until al dente, about 7 minutes.

3. In a sauce pan, saute garlic in olive oil until toasted, about two or three minutes.

4. Add tomato sauce, herbs and chicken. Simmer while pasta boils. Add salt and pepper to sauce to taste.

5. Drain pasta.

6. In a casserole dish, mix the cheeses and lemon zest together.

7. Add cooked pasta, chicken sauce to the casserole dish. Stir until well blended.

8. Top pasta with 1/2 cup mozzarella.

9. Cover casserole dish and bake for 20 minutes.

10. Uncover and bake pasta for 5 to 10 more minutes or until golden brown.

11. Let stand for about five to 10 minutes.

Serve with mixed greens salad and pears … yum!

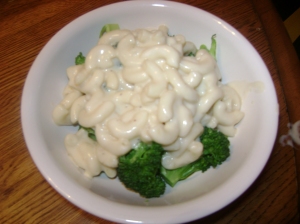
DSC02207With school back in full swing and a fall full of festivals, weddings and showers, I’m always looking for ways to save time. These pasta dishes are the perfect things to cook once and eat twice. The mac n’ cheese recipe is so easy and yummy, I guarantee you will never eat boxed again! And the spicy peanut pasta salad is a great dish to bring to parties or serve on the side of this fantastic grilled portobello mushroom burger recipe from Two Peas and Their Pod.
These recipes also feature some of my favorite tips for getting kids to eat their veggies, and some cooking techniques and time savers. For example, the mac n’ cheese is served over blanched broccoli, which I’ve found pleases kids’ palates much better than the over-cooked mushy steamed broccoli. It also features Ronzoni Smart Taste pasta, which is enriched with fibre, protein and calcium.

I also share a way to blanch the broccoli without a lot of extra steps, and a new-found secret to taking the bite out of onions by “deflaming” them. Finally, I sneak some brussels sprouts into the pasta salad for good measure. Note that all veggies in the following recipes were bought at the Cedar Falls farmer’s market. NOTE: you can make these recipes individually, just cook half the pasta.

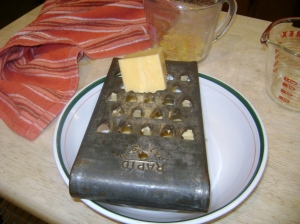
Shredding cheddar cheese.

Shredding cheddar cheese.

Ingredients for Broccoli Mac n’ Cheese:

3 tbsp. butter
2 tbsp. flour
1/2 cup half and half
1 cup milk
1 cup shredded sharp cheddar cheese
1 cup shredded Swiss cheese
1 head of broccoli, cut into small florets
1 box Ronzoni Smart Taste Elbow Noodles
Salt and pepper to taste

Directions:

1. Cut up all of your veggies, keeping broccoli separate and in a strainer.

2. Cook one package of Ronzoni Smart Taste elbow noodles to al dente, according to package instructions. You will use half of the pasta in your mac n’ cheese and half in the pasta salad. (Use this tool to find Ronzoni pasta in a store near you).

3. Blanch broccoli by pouring the pasta water over the broccoli in the strainer. Cover strainer with pot lid and let steam for five minutes.

4. Drain pasta in a separate strainer. You can use half now for the mac n’ cheese and store the other half in a container to make the pasta salad later, if you’d like.

5. Melt butter in a medium-sized sauce pan over  medium-low heat.

6. When butter is melted, add flour one tablespoon at a time, whisking constantly. Whisk for about three minutes or until the “roux” is foamy.

7. Slowly add milk and half and half, whisking constantly until the sauce becomes smooth (this should look, feel and taste like a cream sauce).

8. Turn down heat to low and add cheese. Continue to whisk slowly until cheese is melted.

9. Add 1/2 of the cooked pasta to your cheese sauce. Add salt and pepper to taste.

10. Put desired amount of blanched broccoli in individual soup bowls or plates, then top with mac n’ cheese and serve.

Tip: We serve this dish at our house this time of year with sliced apples and a mixed greens salad.

Spicy Peanut Pasta SaladIngredients for Spicy Peanut Pasta Salad:

3/4 cup chopped brussels sprouts
1 cup baby carrots
1/2 small red onion, diced and deflamed*
3 tbsp. organic natural peanut butter (use this tool to find Smuckers Natural or Organic Peanut Butter at a store near you)
2 tbsp. Nayonaise
2 tbsp. low-sodium soy sauce
2 tbsp. rice vinegar
1/2 small green pepper
1 red chile
3 tbsp. cilantro sprigs
1 tbsp. honey
1 clove garlic
2 teaspoons fresh lime juice

Deflaming an OnionDirections for Spicy Peanut Pasta:

1. Chop veggies.

2. Deflame your onion. To “deflame an onion,” I follow the Rick Bayless method. Put onions in a strainer, then place the strainer in a bowl of cold water with a splash or two of vinegar. Soak while prepping everything else.

3. Put all other ingredients in a food processor and pulse until smooth.

4. Mix dressing, veggies and pasta well. Chill for at least one hour before serving.

Veggie Skettie Soup

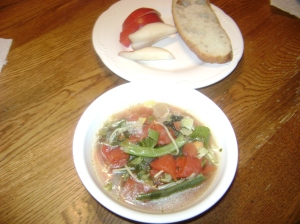
DSC02201If there’s one comfort food every kid loves it’s pasta. They love it served with tomato sauce, cheese sauce, in salads, stir fries and yes, even soups. This recipe combines the Italian seasonings my kids love, plus noodles and A LOT of veggies. This soup, when made with Ronzoni Smart Taste pasta, is chock full of even more vitamins, fiber, protein and calcium!

I discovered Ronzoni last weekend at our cousin Margaret Buckton’s house. This pasta looks and tastes like regular old pasta, but has all the added nutrients of what you’d normally find in a whole wheat pasta, and then some. Add mozzarella or parmasan cheese and you’ve got a yummy, wholesome Italian dinner.

Ingredients:

1 medium onion, diced
2 tsp. olive oil
3 cloves garlic, minced or pressed
5 cups chopped seasonal veggies of your choice: squash, zucchini, eggplant, brussels sprouts, carrots, green beans, broccoli, rutabaga
2 cups diced tomatoes (canned or fresh)
1 can garbanzo or white beans
1 tsp. dried basil (or use fresh if available)
1 tsp. dried oregano
1 tsp. thyme
3 tbsp. fresh parsley
6 cups water
3 cubes low-sodium veggie bouillion
1/2 package Ronzoni thin spaghetti, broken in half
Salt and pepper to taste

DSC02200Directions:

1. Saute onions on medium heat for five minutes or unil clear.

2. Add garlic and saute two minutes.

3. Add spices, except parsley.

4. Add all veggies, tomatoes, bouillion and water.

5. Bring to a boil, then add spaghetti noodles.

6. Boil for 10 minutes, then simmer on low till veggies are cooked through.

7. Serve hot and garnish with parsley and grated mozzarella cheese.

I served this with some crusty Italian bread and olive oil!

Kalmata Hummus

DSC02173If you love olives, you will love this hummus recipe, plain and simple. This is my newest spicy/salty creation, taste tested by coworkers to rave reviews!

I’ve been making hummus for 15 years and I never make it the same way twice. However, this recipe was inspired by my hubby’s cousin, Margaret Buckton, who uses kalmata olives in her hummus to utmost deliciousness. So, I followed her basic recipe and added some fresh cilantro and parsley for good measure. Tahini is an absolute must in any hummus recipe and can be found in local natural or organic food stores everywhere. I always buy mine organic and unsalted, but any old tahini will do!

Tip: My kids love hummus (eat it with a spoon) but it’s an acquired taste. Skip the pepper in this recipe if making it for the kiddos.

Ingredients:

1 can garbanzo beans
1/4 cup tahini
1/4 cup kalmata olives (seedless)
1 clove garlic
1 tsp. cumin
3 tbsp. fresh lemon juice
1 red chile pepper, chopped
1 tbsp. fresh cilantro
1 tbsp. fresh parsley
Sea or kosher salt to taste
1 glug olive oil

DSC02171Directions:

1. Drain beans and save the “juice.”

2. Measure above ingredients into food processor, with the exception of the garbanzo bean juice, salt and olive oil.

3. Process and add garbanzo bean juice a little at a time, until you reach a smooth consistency.

4. Add olive oil.

5. Taste and then add sea salt to taste, 1/4 tsp. at a time.

6. Chill and serve with veggies, pita chips, tortilla chips and possibly even a little plain goat cheese or feta!

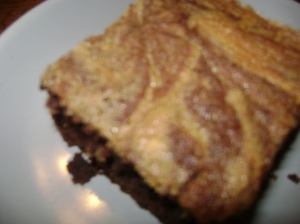
Peanut Butter Fudge BrownieWhen I got home from a conference last night, my daughter, Sophia, had something on her mind. Fudge. She was dying for me to make our family fudge recipe. I didn’t have a candy thermometer, so we compromised with this Peanut Butter Fudge Brownie recipe and she wasn’t disappointed!
Sophia and her brother, Gus, helped me make the brownies this afternoon. Now, let me tell you, baking a new recipe with kids is tough. The first ingredient you have to have is patience. And, with my kids, I need to have eyes in the back of my head. As you can see from the video, they love to taste test along the way!

I have a few tricks up my sleeve when it comes to kids helping out. First, the hand mixers. As I’ve said in an earlier post, this is a must-have utensil because it’s interactive and keeps the kids engaged, though it takes some practice to get used to it. Gus is four and he’s got it down pretty well.

My second trick for cooking and baking is to get a plastic “kid knife.” Kids can use these quite safely to cut anything from butter to veggies. Finally, we use a coffee cup for cracking eggs. This way, the shells are easy to fish out (though in this recipe I used crunchy peanut butter, just in case).

This recipe was sourced from the Southern Food section on About.com and is by Diana Rattray.

Ingredients:

Chocolate Batter:
2 cups sugar
1 cup butter, room temperature
1 teaspoon vanilla
4 eggs
1 1/2 cups all-purpose flour
3/4 cup cocoa, unsweetened
1 tsp. baking powder
1/2 tsp. salt

Peanut Butter Batter:
3/4 cup natural peanut butter
1/3 cup butter, room temperature
1/3 cup sugar
1 tsp. vanilla
2 tablespoons all-purpose flour
2 eggs
1 teaspoon vanilla

Directions:

1. Grease and flour a 13×9-inch baking pan.

2. In mixing bowl, cream 2 cups sugar and 1 cup butter until light and fluffy. Add  vanilla and 4 eggs, 1 at a time, beating well after each addition.

3. Gradually add 1 1/2 cups flour, cocoa, baking powder, and 1/2 teaspoon salt. to the creamed mixture. Mix well. Stir in peanut butter chips.

4. In a small bowl, cream peanut butter and 1/3 cup butter.

5. Add 1/3 cup sugar and 2 tablespoons flour; blend well.

6. Add 2 eggs and 1 teaspoon vanilla; beat until smooth.

7. Spread half of the chocolate mixture in prepared baking pan.

8. Spread the peanut butter batter over chocolate batter.

9. Spread remaining chocolate batter over top.

10. Gently cut through layers with a knife to create a marbled look.

11. Bake brownies at 350° for 40 to 50 minutes, or until top springs back with lightly touched in center with finger.

12. Brownies should begin to pull away from sides of pan.

13. Cool completely in pan.

Gameday Crockpot Chili

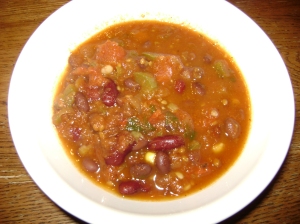
DSC02098I love football season for two reasons. 1. It makes my husband ridiculously happy. 2. This distracted happiness gives me plenty of time to make homemade chili. Nothing says a perfect end to a perfect fall day to me than a huge crock pot full of homemade chili. It’s our family’s favorite comfort food — and this version is ridiculously healthy and flavorful.

I used to make my chili with habenaros and jalapenos, but I’ve learned how to take it down several notches for the kiddies by using a roasted poblano pepper. This gives the chili a smoky, peppery flavor without all of the “heat” from the hot chiles. If you have a gas stove, it’s easy to roast your own pepper. Check out this article from Summer Tomato to learn how. Serve it up at halt-time with fresh salsa, sour cream, pepper jack cheese, jalapenos and lots of blue and red tortilla chips.

Ingredients:

2 tsp. olive oil
1 large onion, diced
1 poblano pepper, roasted, seeded and then chopped
2 cloves garlic, minced or pressed
2 ears of fresh sweet corn, or 1 14.5-oz. can of corn
1 small green pepper, diced
1 small red pepper, diced
1 can red kidney beans
2 cans black beans
2 tbsp. chili powder
1 tbsp. cumin

If using canned tomatoes:
1 14.5-oz. can diced  tomatoes
1 28-oz. can tomato sauce

If using fresh tomatoes, use:
2 cups fresh tomatoes, chopped
2 quarts fresh tomatoes, peeled, cored and pureed
4 tbsp. fresh cilantro (garnish)

Roasted Poblano PepperDirections:

1. Roast pepper. (Follow these directions from Summer Tomato.)

2. Saute onions and peppers in oil on medium-high heat until clear, about five minutes.

3. Add garlic and saute for two minutes more or until fragrant.

If using canned tomatoes:

4. Combine sauteed ingredients and all remaining ingredients in crock pot. Cook on low heat for four hours or until desired thickness (I like my chili T-H-I-C-K).

If using fresh tomatoes:

4. Combine sauteed ingredients and all remaining ingredients in crock pot. Cook on high heat for four hours or until desired thickness (leave yourself an hour of cooking on low heat for a thicker consistency).

Tomato & Zucchini Casserole

DSC02112I made this dish for my book club last week. Our book was The Omnivore’s Dilemma by Michael Pollan. This book is about the way Americans eat and the food chains that sustain us, from industrial down to organic. This dish is in the hyper-local organic category (my terminology) because it features veggies from my neighbor, Kristin’s,  garden and the farmer’s market. The cheeses come from our local dairy outlet, Hansen’s Dairy.
During our discussion, we talked about the difficulties of cooking and eating the hyper-local, organic way. It’s true — this is time consuming and not what most of us are used to. However, the benefits to the environment, our health and our culture outweigh the monetary costs, especially in the long-term. So head out to your garden or farmer’s market and enjoy a dilemma-free meal with your loved ones while these great veggies are still in season!

Ingredients:

2 large zucchini (approx. 8” each, or 3 medium), thinly sliced
1 small onion, sliced into thin rings
3 fresh tomatoes, thinly sliced
3 cloves garlic, minced or pressed
2 to 3 tbsp. olive oil
1/2 cup fresh mozzarella
1/4 cup feta cheese
Freshly ground black pepper
10 fresh basil leaves, cut into a chiffonade

Directions:

1. Preheat the oven to 350ºF (180 ºC). Spray a deep 8 x 8 baking dish (2 quarts) with cooking spray or lightly brush with oil.

2. In a medium bowl, combine cheeses.

3. Layer the veggies and cheese like this: zucchini rings first, then garlic, then tomatoes, then onions, then basil, then cheese. Repeat until you’ve filled your dish and the last layer is cheese. Top with dried basil or rosemary.

4. Cover and bake until zucchini is tender; about 45 minutes.

5. Uncover and bake until cheese is melted and golden, about 10 more minutes.

NOTE: This recipe will be “juicy” from the veggies, there’s no getting around it. The book club members didn’t seem to mind, and I saved the “juice” to use in a soup later.

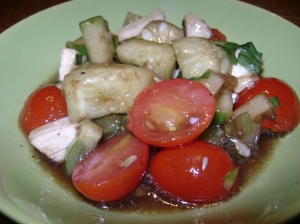
DSC02108With fresh basil, tomato and mozzarella, this cucumber salad is a twist on those fabulous sandwiches served at old-school Italian delis.  I served this up with homemade pizza, but it will go great with any late summer/early fall dinner. It also stays fresh for several days, so it’s great to pack leftovers into kids’ and parents’ lunches.
Ingredients:

1/4 cup extra virgin olive oil
8 tablespoons balsamic vinegar
1 heaping tbsp. organic sugar
1/4 cup water
1/2 teaspoon sea or kosher salt
1 clove garlic, minced
10 fresh basil leaves
3 small fresh cucumbers, chopped (pickling or thin slicing)
10 cherry tomatoes
3 tomatillos
1/2 cup fresh mozzarella, cubed
3 garlic or regular chives, minced
Freshly ground pepper and salt to taste

Directions:

1. Slice cukes in half, turn them onto their bellies and cut them into thirds. Cross-cut the thirds to make cubes.

2. Slice tomatoes in half.

3. Mince garlic and add it to a large liquid measuring cup.

4. Pour 1/4 cup extra-virgin olive oil into the measuring cup.

5. Add balsamic vinegar and sugar.

6. Whisk the above ingredients together until well combined. Add water and whisk again.

7. Sprinkle salt, pepper and garlic chives over the cukes and tomatoes in a large bowl. Add mozzarella, then pour vinegar/oil mixture over the veggies/cheese.

8. Stir all ingredients until well combined. Do a taste test and add salt and/or pepper to taste.

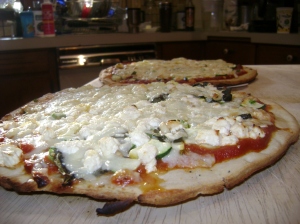
DSC02106This pizza recipe is soooo easy and guaranteed to be kid-friendly. Now, not every ingredient in this recipe is from scratch, but sometimes, busy parents need to compromise in order to fit a good meal into a crazy schedule. It takes about 15 minutes of prep time (kids can help) and 12 to bake.

I like to buy organic crust and sauce, but you can use whatever you have available. Since summer squash is still in season, I used it in this recipe, but you could also use broccoli, peppers, onions, mushrooms, whatever veggies you have available. Just make sure you use fresh mozzarella and real feta cheese!

Ingredients:

1 prepared pizza crust (such as Boboli)
1 jar spaghetti or pizza sauce (such as Muir Glen)
1 cup shredded fresh mozzarella
1/2 cup crumbled feta
10 basil leaves
1 small summer squash, thinly sliced
1 small zucchini, thinly sliced
2 tbsp. pine nuts

DSC02110Directions:

1. Follow directions on prepared pizza crust for preheating oven and preparing crust.

2. Spread about 1 cup prepared pizza sauce on the crust.

3. Place squash and zucchini over sauce.

4. Sprinkle pine nuts evenly over squash/zuke.

5. Place basil leaves curved side down over pine nuts.

6. Spread cheeses evenly over everything.

7. Bake for about 12 minutes (at 425) or until golden brown and cheese is completely melted.

8. Serve with a small lettuce salad and enjoy! (Gus is enjoying his by picking off the veggies, but oh well.)

DSC02111